How To Plan A Website Structure In 2026
Updated Dec 23, 2025 | Published May 6, 2025 | 19 min read
Updated Dec 23, 2025 | Published May 6, 2025 | 19 min read

It can be intimidating if you’re unsure how to plan a website, but breaking it down into manageable steps can simplify the process. A clear structure is one of the best ways to ensure your site looks great, works well, and supports your long-term goals.
Creating a detailed plan in advance helps you avoid common mistakes. These include building too many web pages or selecting the wrong platform. Get a clear idea of how you want your visitors to move through your site, what content they need, and how to guide them toward their next action.
So without further ado, here’s our guide to creating a website structure from scratch, even if you’ve never done it before.
Website planning involves making decisions before you create anything. You choose your goals, sketch your web pages, and decide how everything connects. At this stage, it’s not about design or colors; it’s about structure and purpose.
A well-planned website begins with a solid foundation. It shows visitors what you do, what they should do next, and why they should stay. Even a basic site will benefit from a thoughtful layout. A few well-placed pages, clear calls to action, and a simple navigation menu can improve how people use your site.
Planning your website structure early makes everything much easier going forward. From knowing what to build to making sure your site helps you reach your goals.
Here are a few key reasons why it’s worth doing before you dive into design or content.
Planning upfront helps you avoid surprises, missed deadlines, and last-minute changes. When you’re excited to start a website project, it’s easy to overlook all the parts involved. What begins as a simple idea can quickly grow beyond your expectations.
Once you know what kind of content you’ll need and how it fits together, managing your time and resources becomes easier. You can make a realistic timeline and spot potential problems early on. This is especially useful if you’re working with a professional web designer or developer.
They’ll want a clear list of what to build, which features are most important, and what is not needed. That way, you avoid paying for work that doesn’t support your goals.
A proper planning process helps you budget accurately for your entire site. You’ll know exactly how much it costs to build a website. Consider hosting, domain names, and web design tools to prevent unexpected expenses.
You can compare different options and choose the one that fits your project budget. Website planning also shows you where you might save money or where it’s worth spending more.
Your business objectives shape everything from design choices to content writing. If you don’t know what your site is supposed to achieve, it’s nearly impossible to make it work.
Think about the purpose behind your site creation. You may want to attract more clients, sell products, grow a mailing list, or share ideas with a specific audience.
You can ask yourself some simple questions about your site.
When you start thinking about your website’s creation, adding features simply because they look nice can be tempting. Remember, however, that if something doesn’t serve your goal, it doesn’t belong on your site.
Ready to create a website? Get started with Friday today.
Our website planning guide breaks down the development process into manageable steps. Each step builds on the previous one to create a solid foundation for your site.
Hosting is the service that keeps your site online and accessible 24/7. Without it, your domain won’t connect to anything, and no one will be able to visit your site.
There are different types of hosting, such as:
Beginners usually start with shared hosting, the most affordable and straightforward setup. In shared hosting, your site shares server space with others, making it suitable for personal sites, portfolios, or small businesses with moderate traffic.
As your site grows, you might need to switch to a VPS (Virtual Private Server) or cloud hosting for better speed and control. These options cost more but handle traffic spikes more effectively, giving you greater power behind the scenes.
If your hosting service goes down, your website will be inaccessible. When comparing providers, check their uptime guarantee and look for one close to 99.9%. Speed is another significant factor. A slow website drives people away, especially on mobile devices.
Customer support is critical, too. Hosting issues can be technical and frustrating, and you don’t want to affect your site’s functionality for too long. Select a provider that offers 24/7 live chat or phone support, enabling you to receive assistance when needed.
Many hosting plans include a free domain, one-click WordPress installation, free SSL certificates, daily backups, and built-in email hosting. These features can save you time and money, especially when starting from scratch.
Hosting is included if you use an all-in-one website builder like Friday, so you won’t have to worry about setup or maintenance. This can be great for beginners, although you’ll have to trade off some control and customization options later.
The best hosting providers enable you to scale up easily without starting over. You can begin small, but don’t skimp too much. A few dollars more each month can provide faster load times, better support, and greater peace of mind.
Your entire site should feel like it has been built for your target audience. Understanding who they are, what they need, and how they behave online is essential. If you’re unsure how to design a website, begin by keeping the end user in mind. The more you know about your target audience, the more helpful your content and structure will be.
For example, a site aimed at busy parents should be fast-loading, mobile-friendly, and simple to navigate. A site for web developers may require more in-depth documentation and additional customization options.
There are several methods for conducting user research. If you already have customers or followers, send a quick survey. Check analytics from the social media platforms where your target audience is most active. Read blog comments, Reddit threads, or online reviews to identify the pain points your audience is experiencing.
If you’re starting from zero, create an audience profile or fictional characters that represent different segments of your audience. Having real people in mind will help with your website layout ideas and content.
Remember that website accessibility is essential, as not everyone reads at the same level or uses the same device. Clear fonts, good contrast, and a mobile-responsive design show that you respect your website visitors’ time and needs.
Your unique selling proposition (USP) makes your website stand out and isn’t vague. “High-quality service” doesn’t mean much until you explain what makes your service better, faster, easier, or different. It could be your pricing, personal story, turnaround time, or even tone of voice.
Begin by listing what you offer and how it compares to similar types of businesses. Then, highlight what you provide that no one else can. A clear USP helps people understand your site within the first few seconds. When they land on your homepage, they know what you do and why you’re different.
Your message should be prominently displayed in key areas, including your homepage, the site’s tagline, the “About” page, and the “Contact” page. You can support your claims using testimonials, case studies, or reviews.
If you claim to be the fastest, share a screenshot of your delivery times. If you’re the friendliest, include a video showing how you talk to customers. Your USP also affects your content. A blog post from a high-end consultant will sound different from a friendly DIY expert.
Your website structure is like a roadmap, guiding visitors exactly where they need to go. Start by listing the key landing pages: home, about, contact, services or products, and a blog if you plan to share regular content.
Next, break those down into smaller parts. For example, under “Services,” you might have pages for consulting, training, or pricing. Sketch your site like a tree: the home page is at the top, with main branches connecting to major sections and smaller branches for subpages.
This is called a sitemap; you can create it with free tools like Lucidchart or draw it on paper. Think about the user flow. When someone lands on your site, where should they go next? They could click a blog post, read about your services, and then fill out a contact form. Your structure should support the natural flow of the user journey.
A simple, well-organized structure also helps with search engine indexing. Google and other search engines’ crawl’ your site, following links to understand what’s important. If your structure is too deep or chaotic, some pages may never get indexed or appear in search results.
Use consistent naming conventions for your navigation. If your top menu includes “Start Here,” “About,” and “Help,” ensure that the content under these labels is aligned. Don’t make users guess where to click.
If your site has lots of content, include a clear search bar. It helps people find what they’re looking for without scanning every page. If your site is small, consider using a sticky menu to keep navigation always visible, especially on mobile devices.
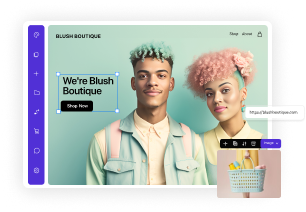
A website builder is a tool that turns your ideas into a functioning site, with no coding required. For beginners, picking the right website builder makes the process smoother and more enjoyable. There are two main types of builders: hosted and self-hosted.
Hosted builders such as Wix, Squarespace, and Shopify include hosting, support, templates, and drag-and-drop editors. You pay a monthly fee, and they handle the tech side. You’ll need a hosting provider, and you can install themes, plugins, and custom code.
Think about what features you need now and what you’ll want later. If you sell products, ensure the builder has a shopping cart, secure checkout, and inventory tools. If you want a blog, look for features such as built-in post management, categories, and RSS feeds.
Select a template that aligns with your brand’s personality. Clean and minimal designs work well for portfolios, while bold and colorful styles might suit a creative agency. Most builders allow you to customize fonts and colors and bring your website layout ideas to life without requiring code changes.
Budget plays a significant role. While free plans are great for testing, most serious websites require a paid plan for features such as custom domains, analytics, or e-commerce capabilities. Compare pricing carefully, as some builders charge extra for basic features like contact forms or email integrations.
Think about the future and scaling your business. Can you easily add pages or switch themes without breaking anything? Can you export your content if you decide to move in the future?
Create a comprehensive brand style guide encompassing your logo, color palette, typography, icons, high-quality images, and videos.
With your visual assets in place, the next step is to focus on creating or curating compelling content.
No coding required: Build your website with Friday.
Your new website is only as strong as the content it offers. People visit your site to read, watch, or download content, and search engines use this information to determine whether your site is worth displaying.
If writing isn’t your thing, that’s okay. You can hire a freelance writer, work with a content strategist, or even use AI writing tools as a starting point. Just rewrite anything you don’t fully understand or can’t stand behind. Authenticity matters, especially for small businesses and personal brands.
Original content matters for search engines, too. If you copy and paste content from other websites, your site could be penalized in search rankings. It’s always better to write your version, even if it takes longer.
Remember to use visuals, such as helpful graphics or images, as they can make a blog post more engaging and valuable. A simple chart or process graphic in your website layout can make a “How It Works” page easier to follow. Photos, icons, and videos are part of your content plan and should be consistent with your overall site design.
You can also curate content if you’re pressed for time or resources. That means collecting useful links, summaries, or quotes from other trustworthy sources, then adding your commentary or take. Done right, this adds value and positions you as a helpful guide.
You can use an editorial calendar to stay on track. It doesn’t have to be fancy. A spreadsheet with topics, publish dates, and status is enough to keep your content organized. This will avoid last-minute scrambling and ensure your content is balanced and functional.
SEO stands for Search Engine Optimization, and it’s how people find your site through search engines. SEO is important because it matches your content to what people are seeking. That’s where keyword research comes in.
Your page titles, headings, and meta descriptions should use these keywords naturally. Don’t repeat them; write sentences that flow well and answer fundamental questions. Remember, search engines read your site like a person would. If your content sounds weird or robotic, it won’t rank well.
Beyond text, your site’s structure is also essential. Include the following:
For example, a blog post about “choosing the right lens” should link to your services page if you’re a photographer. This helps search engines understand the relationships between your pages.
Images should also be optimized. Use clear filenames and alt text, and ensure image sizes are small enough to load quickly. Page speed is a crucial factor in Google’s ranking system, and slow sites tend to lose traffic quickly.
Technical SEO can sound intimidating, but it’s primarily about following straightforward guidelines: ensuring fast load times, implementing a mobile-friendly design, maintaining clean code, and avoiding broken links. Many website builders include built-in SEO tools or plugins that help you check your work as you build.
Your new website should be able to grow with you without needing a complete rebuild six months later. That means thinking beyond what you need now and preparing for what might come next. Begin by selecting a platform and structure that makes updates easy.
For example, if you have started a personal website and know you’ll begin blogging or selling products later, choose a system that allows you to add those features. If you’re working with a developer or designer, ensure they build your site with expansion in mind. That might mean allocating extra space in the menu for new pages or ensuring the site can cope with global website traffic.
Your site must handle a surge in traffic if you run a promotion, launch a new product, or receive a social media shoutout. Choose a hosting provider with scalable plans, so you’re not stuck when you outgrow your starter plan. Google Analytics and other tools help you identify which pages people visit, where they leave, and how they found you, enabling you to update content, plan effective campaigns, and refine your layout.
Backups and security are also part of growth. As your content grows, the risk of losing something increases. Set up automatic backups with your hosting provider or a plugin, and add security features such as two-factor authentication, malware scans, or brute-force protection.
As your audience grows, they’ll expect more. That could mean faster support, better web design, more content, or new tools. Plan for features such as contact forms, email sign-up, live chat, or downloadable guides. You don’t have to launch them all at once, but knowing where they’ll fit saves time in the long run.
Finally, document your systems if you have a scalable business idea that will grow. If you ever bring in a writer, developer, or assistant, they should be able to follow your process. Keep a folder with your branding elements, a copy of your sitemap, content, brand guidelines, and passwords for key tools.
Before going live, create a comprehensive website launch checklist and conduct a final walkthrough to ensure everything is in order.
After you launch, give search engines a heads-up by submitting your site to Google Search Console. Create and upload if your website platform doesn’t automatically generate a sitemap. This helps Google index your site and display it in search results more quickly.
Plan to keep your site updated. Set a reminder to review content monthly. Add new blog posts, swap out old images, and update service details. A fresh site gives people a reason to return and helps improve your search engine rankings.
Still have questions about planning a website? Here are some quick answers to some of the most common questions people ask when planning their first website.
Not always. Many small sites are built using drag-and-drop builders that don’t require any code. However, working with a professional web designer can be worthwhile if you need custom features or lack the time to learn.
It depends. Some people plan their entire site over the weekend, while others take weeks to map everything out. What matters is having clear goals and not rushing essential decisions.
That’s normal. Your site will grow with your business. A solid structure now makes redesigns easier in the future. Save backups and update your content management system to avoid data loss.
Jumping straight into building a website often results in messy layouts, missing pages, or content that doesn’t align with your goals. Taking time to plan your web project helps you avoid frustration later.
Yes, but it’s not always simple. If you think you might switch later, choose tools that allow you to export your content. Some platforms lock you in, so be sure to read the fine print before committing.
Planning your website before building it saves time, money, and frustration. But if you don’t know how to plan a website, you don’t need to be a designer or developer; you need a straightforward web design process.
Start with your goals and audience. Select tools that align with your needs and budget. Map out your pages, write helpful content, and build a site that’s easy to use and grow. One step at a time is all it takes. Once your site is live, continue to improve it. Watch how people use it, keep your content fresh, and plan for monthly minor updates. A well-planned site isn’t just visually appealing; it works hard for you daily.